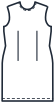
Measurements you need
Tape horizontally across the most prominent points of the bust, at the back — slightly above the shoulder blades, under the arms. In your usual underwear, not pulled tight.Tape horizontally across the most prominent points of the bust, at the back — slightly above the shoulder blades, under the arms. In your usual underwear, not pulled tight.
Usually 31½–51⅛ in.Usually 80–130 cm.Tape horizontally under the arms, in front — above the bust, at the back — across the shoulder blades. The difference from the bust shows how much the bust projects: the bust dart depends on it. You can leave 0 — we'll calculate for an average bust.Tape horizontally under the arms, in front — above the bust, at the back — across the shoulder blades. The difference from the bust shows how much the bust projects: the bust dart depends on it. You can leave 0 — we'll calculate for an average bust.
Usually 1⅛–3⅛ in less than the bust.Usually 3–8 cm less than the bust.Tape horizontal around the narrowest part of your torso, usually ¾–1⅝ in above the navel. Snug but not tight; don't pull in your stomach.Tape horizontal around the narrowest part of your torso, usually 2–4 cm above the navel. Snug but not tight; don't pull in your stomach.
Usually 22⅞–43¼ in.Usually 58–110 cm.Tape horizontal around the fullest part of your buttocks, allowing for the curve of your stomach. Stand straight, feet together.Tape horizontal around the fullest part of your buttocks, allowing for the curve of your stomach. Stand straight, feet together.
Usually 33⅛–51⅛ in.Usually 84–130 cm.Tilt your head: a prominent vertebra can be felt at the base of the neck at the back. Tape from it down along the spine to the waist tape.Tilt your head: a prominent vertebra can be felt at the base of the neck at the back. Tape from it down along the spine to the waist tape.
Usually 14⅝–17⅜ in.Usually 37–44 cm.At the side from the waistline down to the desired hem. For a knee-length skirt — about 23⅝ in, for pants — to the floor or to the ankle bone.At the side from the waistline down to the desired hem. For a knee-length skirt — about 60 cm, for pants — to the floor or to the ankle bone.
Skirt 15¾–39⅜ in, pants 35⅜–43¼ in, shorts 11¾–21⅝ in.Skirt 40–100 cm, pants 90–110 cm, shorts 30–55 cm.Choosing ease
Ease is the extra room added to your body measurements. The default is semi-fitted dress ease: bust 2 in5 cm, waist 1⅛ in3 cm, hip 1⅛ in3 cm. For a fitted dress in stretch fabric, reduce them by ⅜–¾ in1–2 cm; for a loose fit, increase them. You can change them in the "Fit, ease and seams" section.
| Dress | Bust | Waist | Hip |
|---|---|---|---|
| Fitted | +1⅛ in3 cm | +⅜–¾ in1–2 cm | +⅜–¾ in1–2 cm |
| Semi-fitted | +2 in5 cm | +1⅛ in3 cm | +1⅛ in3 cm |
| Loose | +2¾–3⅛ in7–8 cm | +2⅜–3⅞ in6–10 cm | +2–2⅜ in5–6 cm |
How the dress block is drafted
The block is drafted on a half-dress grid: its width is half the bust plus ease. The grid is divided into back width, armhole width, and front width; if back width and front width are entered, the armhole width is calculated by the rule "back width + front width + two armhole widths = bust". The armhole depth is measured from the prominent vertebra. The front is longer than the back by the excess over the bust — this is taken up by the bust dart from the side seam, so when the dart is sewn, the side seams of the front and back match. The difference between bust and waist is distributed among the side seams, the center back seam, and double darts on the front and back; below the waist, the side seams flare out to the hips.
The pattern maker checks the draft itself: bust, waist, and hip circumferences along the finished outline, equal side seam lengths, back shoulder fit, neckline ease, and armhole length. The results are in the "Draft check" section.
How to print and tape
Download the PDF on Letter or A4 sheets and print at 100% scale, without "fit to page". The first sheet has the test square: measure it with a ruler. Tape the sheets together with an overlap along the strips ⅜ in1 cm; sheet numbers and the assembly diagram are on the first page. For a copy shop or plotter, choose "One-sheet PDF".
What you get
A full-scale back with a center seam (or on the fold — your choice) and a front on the fold: bust and waist darts, waist and hip lines, grainline, seam allowances, and hem allowance. Below the drawing is the armhole length for drafting the sleeve.
FAQ
Which measurements are required?
Bust, waist, hip, back waist length, and dress length. The high bust is needed for the bust dart — if left at 0, the pattern maker will calculate the dart for an average bust. The other measurements are refining: if they are 0, the pattern maker will estimate them from the bust.
Why is the "high bust" measurement needed?
The difference between bust and high bust shows how much the bust protrudes. The bust dart is calculated from it: the larger the protrusion, the wider the dart. This is more accurate than guessing a "cup size".
What to do with the block next?
The block is a fitted straight-silhouette dress without a closure or sleeves. You can sew it as is, or use it for patternmaking: move the bust dart to the shoulder or a princess seam, change the neckline, widen the hem, cut at the waist. Before sewing from expensive fabric, make a muslin and adjust the fit.
What about the sleeve?
The one-piece sleeve is drafted on the adjacent "Sleeve" page — using this block's armhole: the pattern maker remembers your measurements. Matching notches are on the dress armhole and the sleeve cap (one on the front, two on the back); use them to align the sleeve with the dress.
Why is the dart from the side seam and not the shoulder?
This way it doesn't distort the armhole, and the block is easier to use for further patternmaking. The dart can be moved to the shoulder, neckline, or waist — when moved, its intake (angle) stays the same.