Bias tape: how to make it and sew it on
Bias tape is a strip of fabric cut at a 45° angle to the selvage. Fabric stretches most on the bias, so bias tape follows any curve—a neckline, an armhole, the round edge of a potholder—without puckers or wrinkles. You can buy it ready-made, or make your own from your fabric in 15 minutes.
Store-Bought or Make Your Own
Ready-made bias tape comes in rolls: cotton, satin, knit, with the edges already pressed. It’s convenient, but it doesn’t always match in color and weight. Bias tape made from your main fabric looks neater and blends in better, and on lightweight fabrics it’s the only way to get a clean edge.
| Strip width to cut | Finished width | Best for |
|---|---|---|
| 2.5 cm1 in | about 0.6 cm¼ in | necklines and armholes on lightweight fabrics, tape turned to the inside |
| 3.5–4 cm1⅜–1⅝ in | about 1 cm⅜ in | binding necklines, armholes, and sleeve hems |
| 5–6 cm2–2⅜ in | 1.5–2 cm⅝–¾ in | potholders, blanket edges, bags |
How to Cut Bias Tape
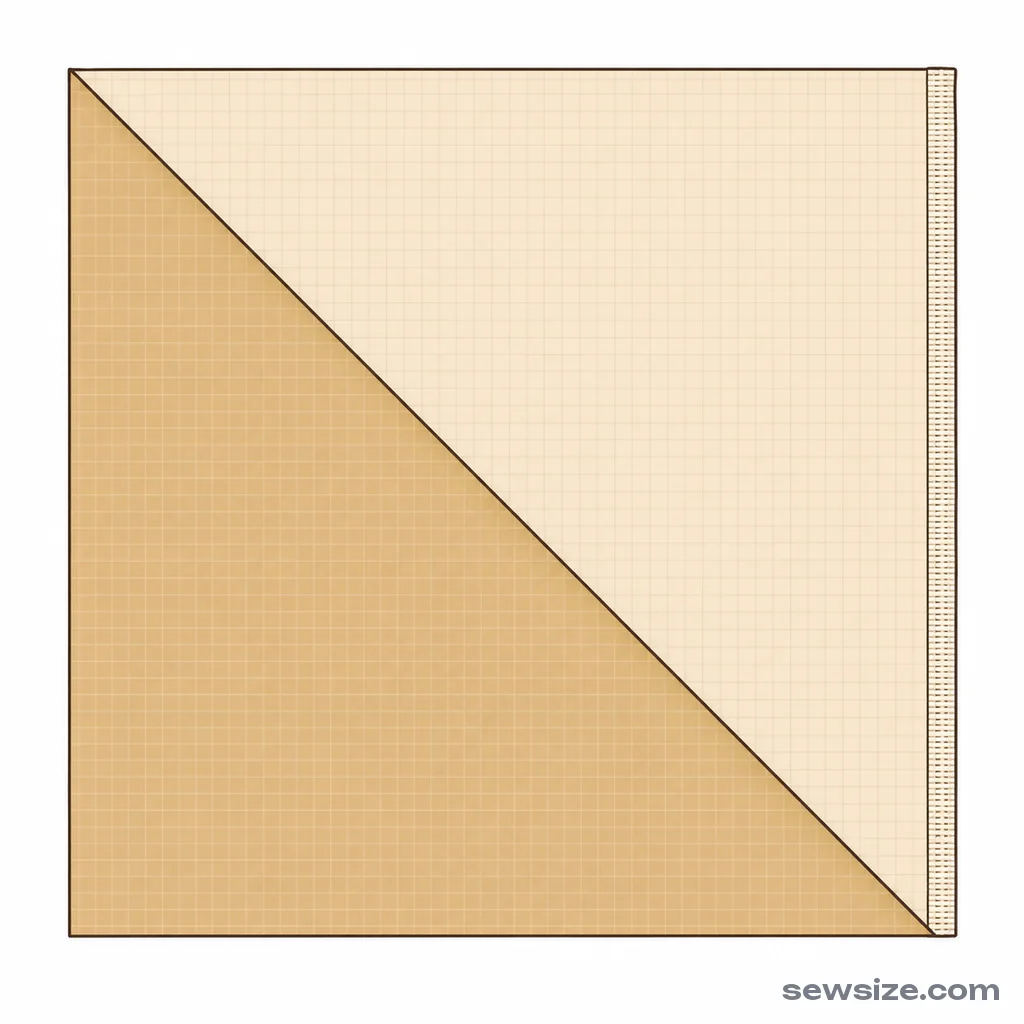
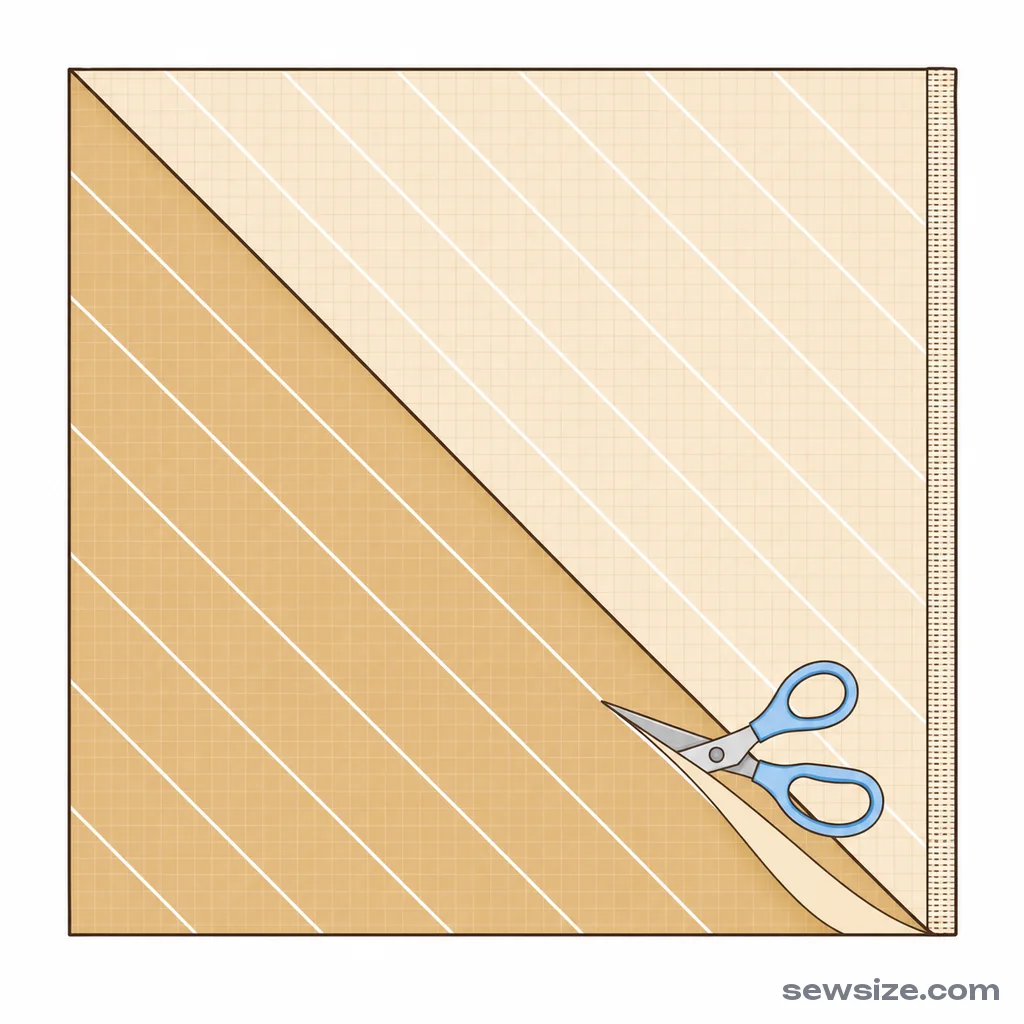
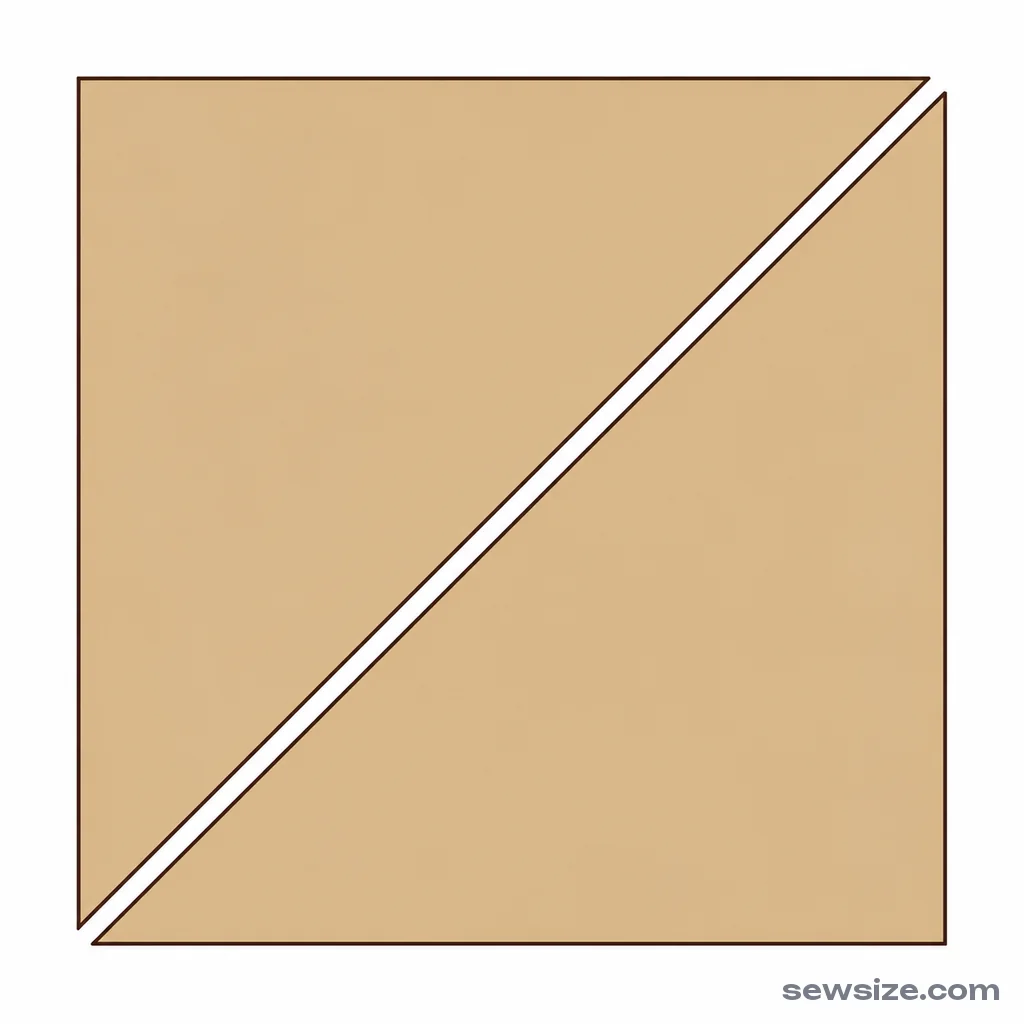
- Lay the fabric out in a single layer. Fold one corner over so the crosswise cut edge lies along the selvage: you’ll get a triangle, and the fold line is exactly 45°.
- Press the fold with an iron and cut along it.
- Parallel to this cut edge, mark strips of the desired width with chalk and cut them out. A ruler and rotary cutter make this easiest.
 1
 2
How to Sew the Strips into One Long Tape
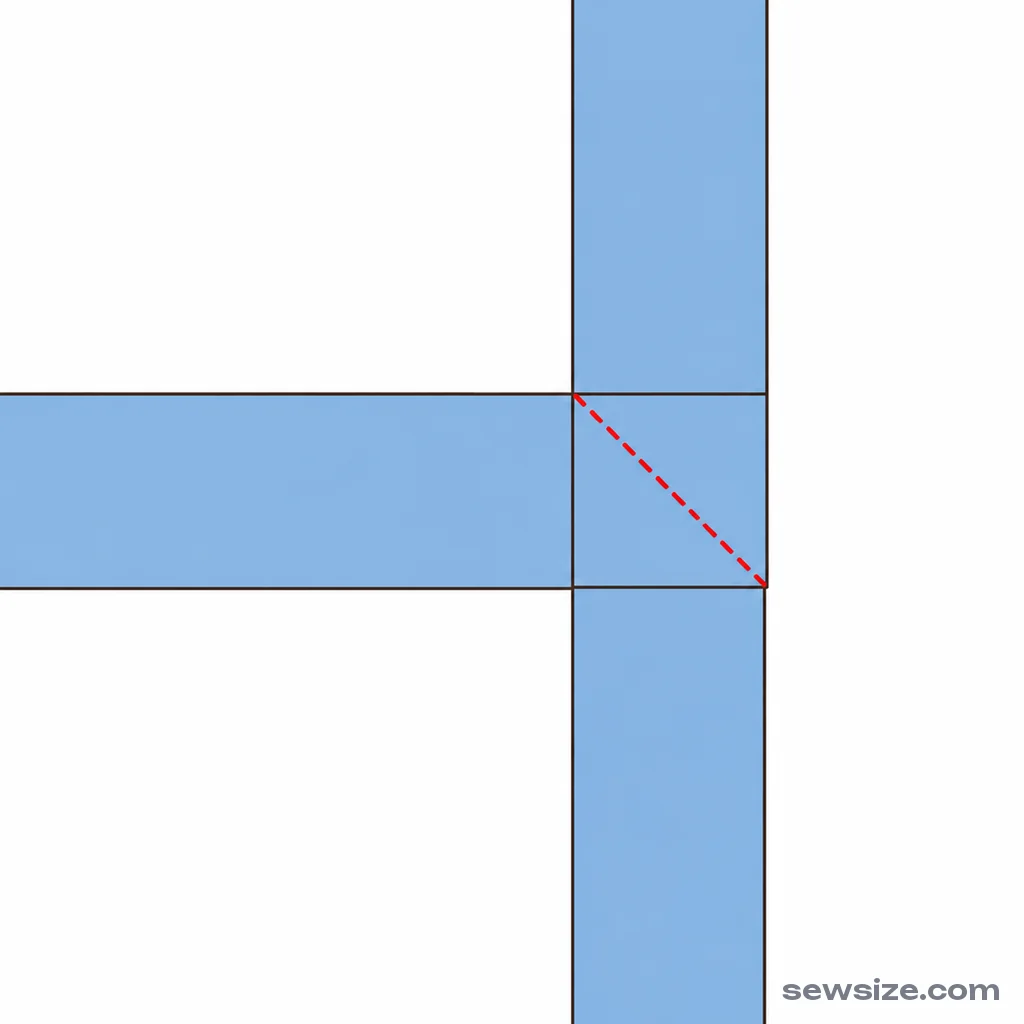
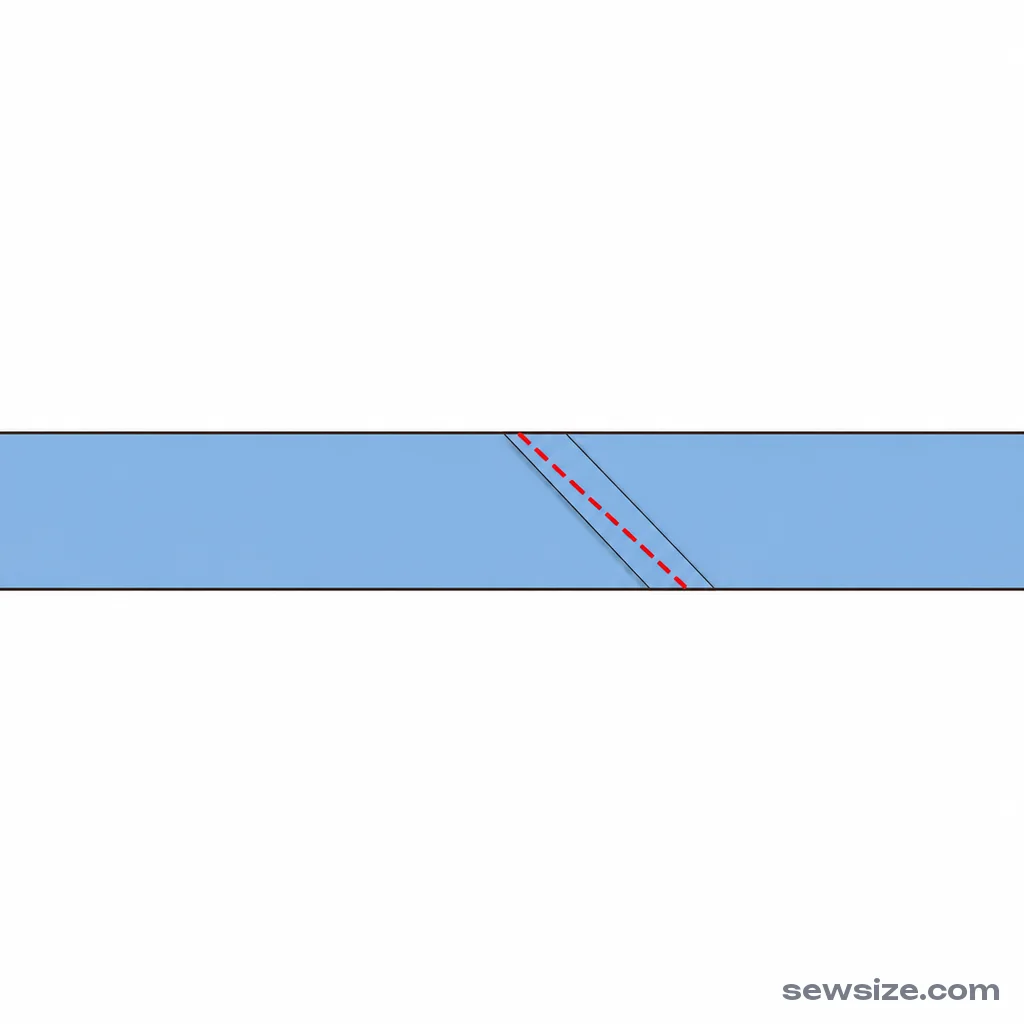
Sew the strips together along the lengthwise grain rather than straight across—the seam then runs on the bias and doesn’t add bulk to the tape.
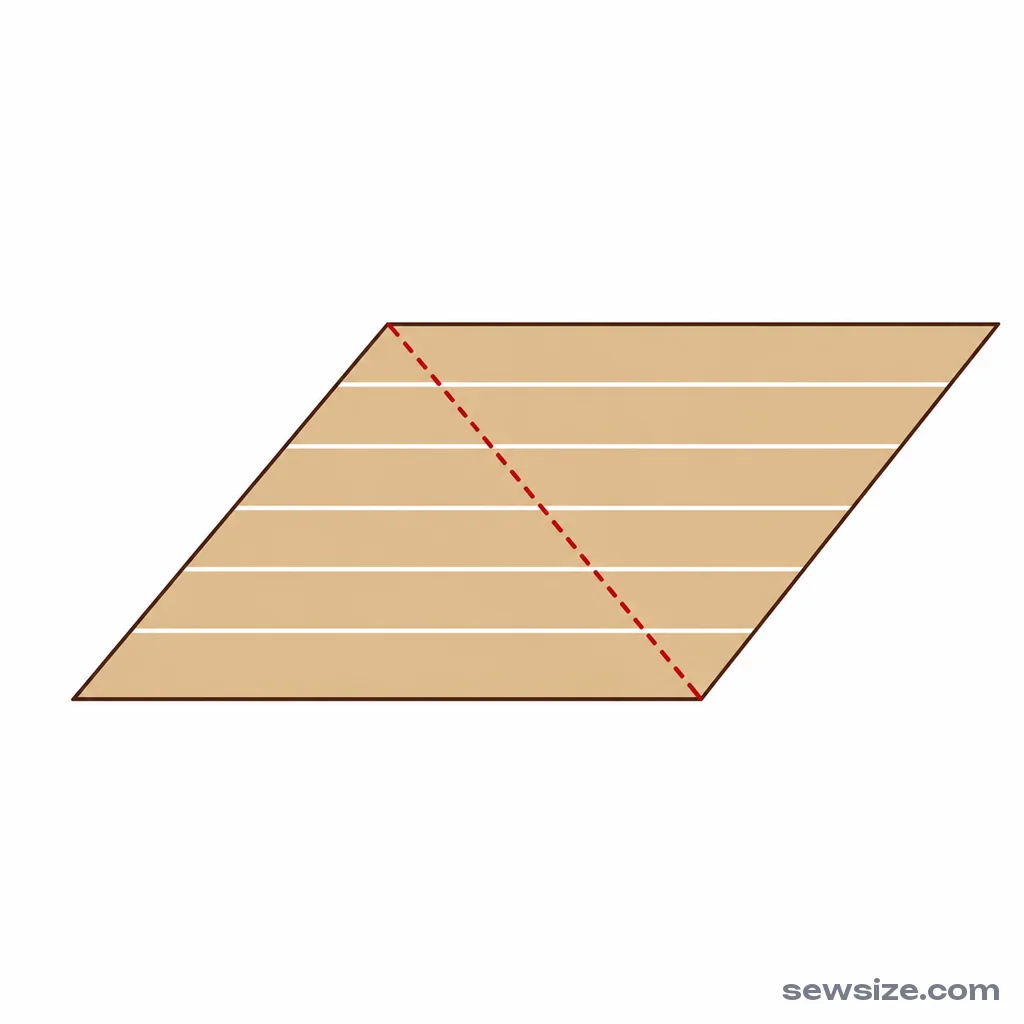
- Place two strips right sides together at a right angle, with the ends overlapping.
- Sew diagonally from corner to corner.
- Trim the seam allowance to 0.5 cm¼ in and press the seam open. Trim the protruding corners.
 1
 2
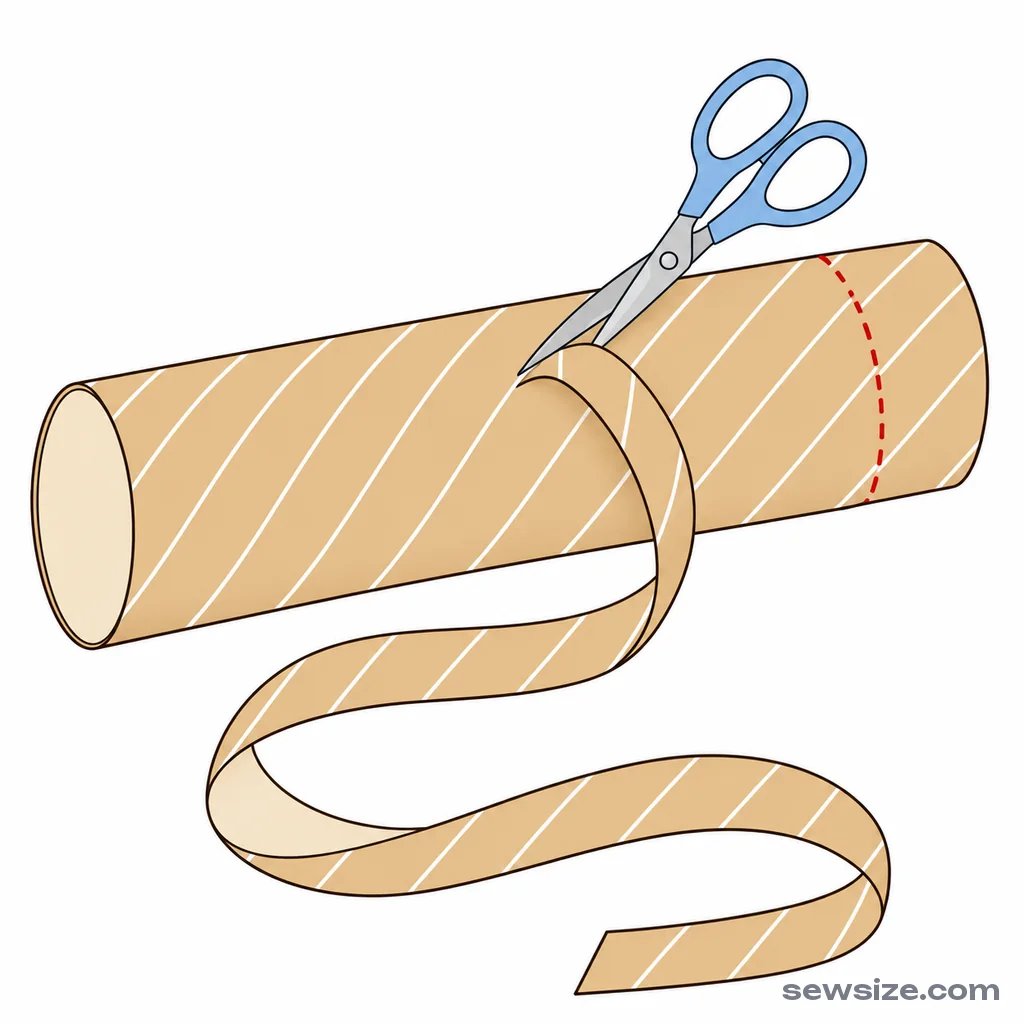
If you need a lot of bias tape (for a blanket or tablecloth), it’s faster to make continuous bias tape: sew a square of fabric into a tube with an offset equal to the strip width, then cut it in a spiral to make one long strip.
 1
 2
 3
How to Press Bias Tape
For binding, pre-fold the bias tape: both edges to the center, then in half. A bias tape maker—a metal funnel—makes this easy: the strip passes through it, and the edges fold themselves as you press. Without one, fold the edges with an iron, pinning them to the ironing board.
Before sewing bias tape to a curve, press it into shape: gently stretch one edge with the iron and bend the tape into a curve. Then it will lie flat without wrinkles.
Binding an Edge with Bias Tape
Binding is when bias tape wraps around the raw edge on both sides and shows as a strip on the right side. The most reliable machine method:
- Unfold one folded edge of the bias tape and place it right side to the wrong side of the garment, raw edge to raw edge.
- Stitch along the fold line of the bias tape.
- Wrap the bias tape over the raw edge to the right side, covering the stitching line.
- Topstitch along the edge of the bias tape on the right side, 1–2 mm⅛ in from the fold. The stitching on the wrong side will run along the bias tape next to the seam.
On potholders and bags, bias tape is often topstitched on both sides at once with a single line of stitching, with the raw edge tucked inside the folded bias tape. It’s faster, but the stitching may not catch the lower edge. For beginners, the two-step method is more reliable.
Neckline and armholes with bias tape
There are two ways to finish a neckline with bias tape.
Bound finish (the tape shows on the right side). Work it as described above. Start at the shoulder seam and join the ends of the tape with a diagonal seam, or fold one end under the other.
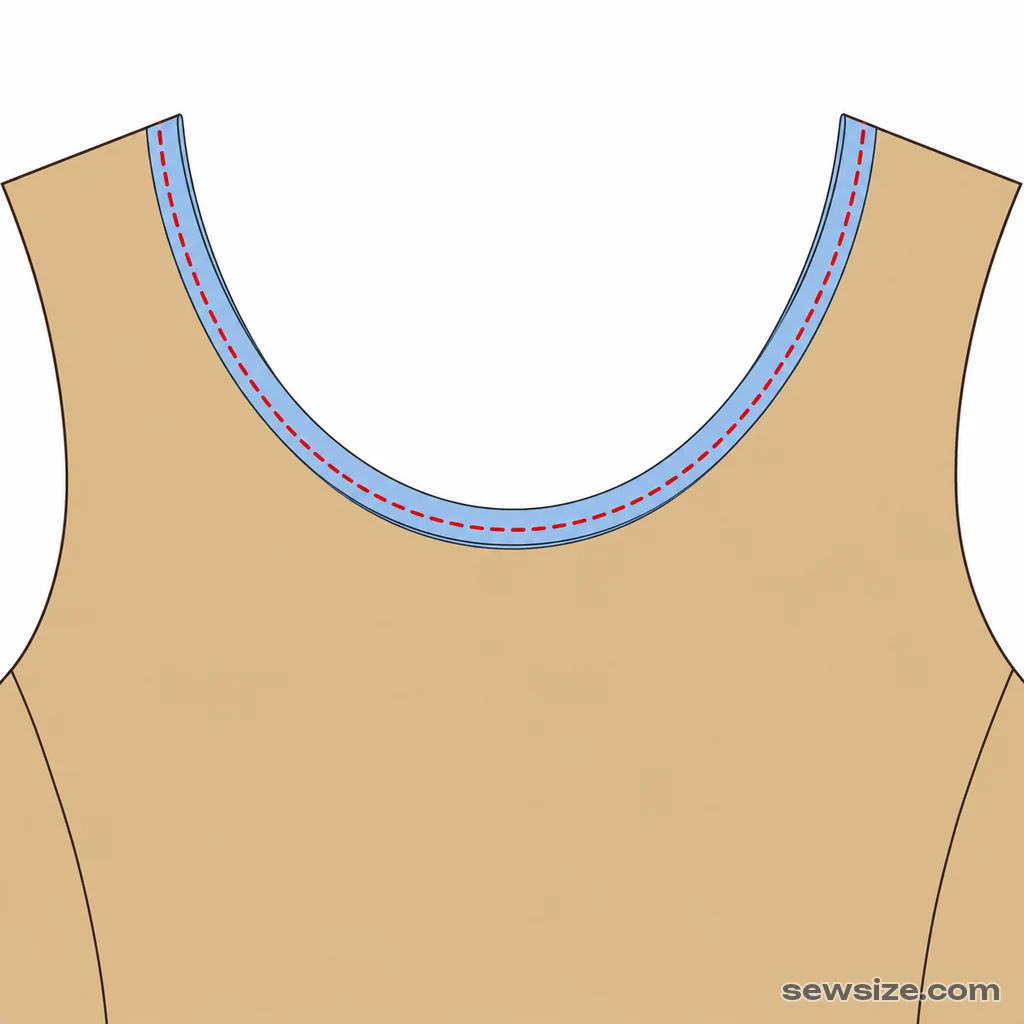
Tape turned to the inside (only a line of stitching shows on the right side). This is how necklines are finished on dresses, blouses and T-shirts:
- Trim off the neckline seam allowance if there is one: the neckline is finished with no seam allowance.
- Fold the bias tape in half lengthwise with the wrong side inside and place it on the right side of the neckline, raw edges matching. Sew it on 0.6–0.7 cm¼ in from the edge.
- Clip the seam allowance on the curves about every 1–1.5 cm⅜–⅝ in, stopping 1 mm⅛ in short of the stitching line.
- Fold the tape all the way to the wrong side, work the seam so the tape doesn't show on the right side, and press.
- Topstitch from the right side along the edge of the tape, 0.5–0.6 cm¼ in from the neckline edge.
 1
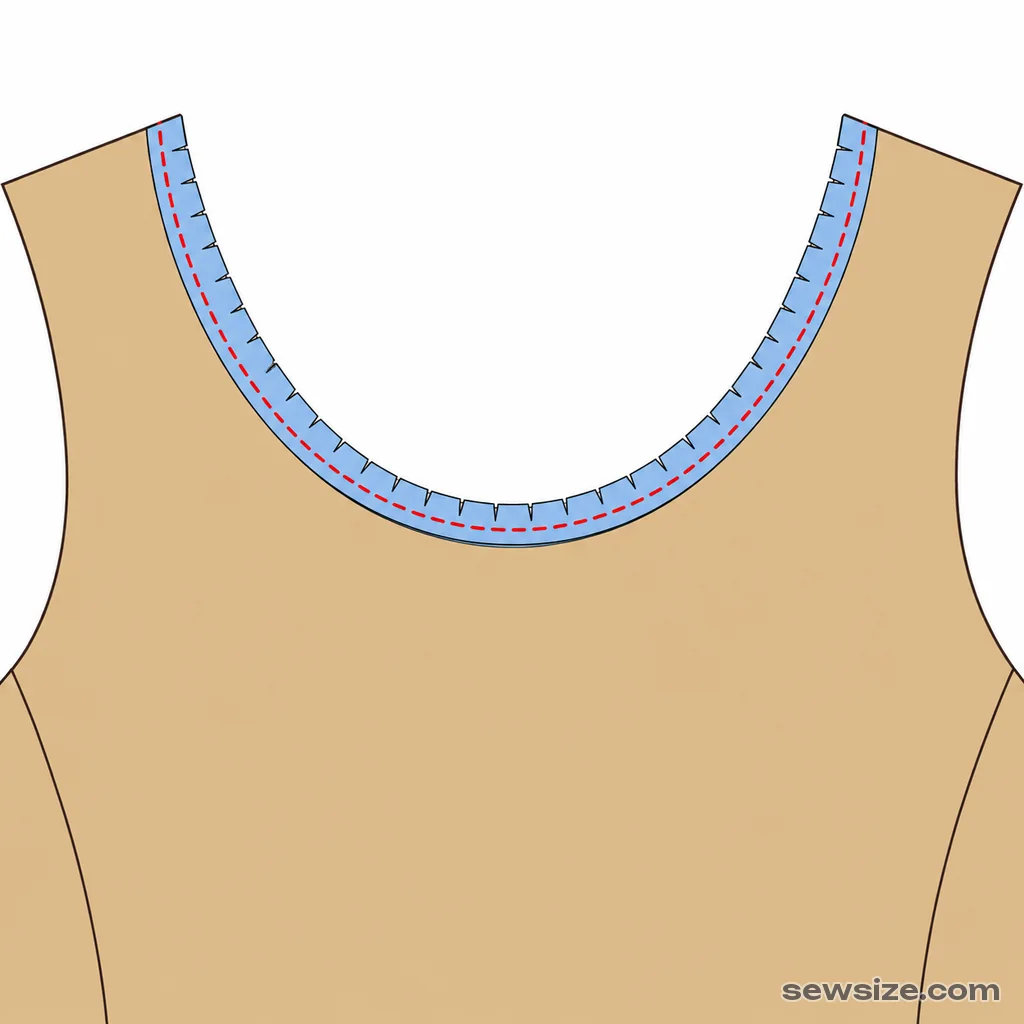 2
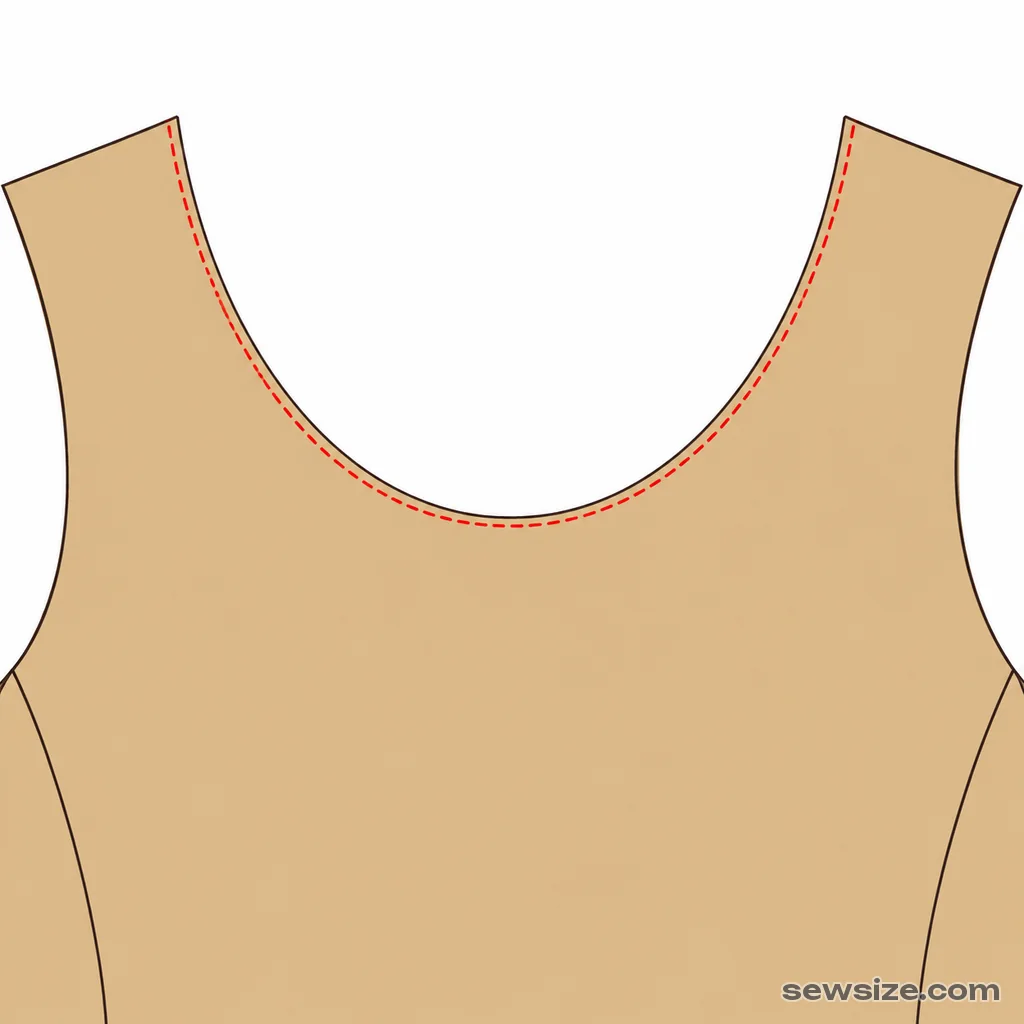 3
Armholes are finished the same way; the ends of the tape disappear into the side seam if you sew the sides afterwards. Step-by-step instructions with bias tape are on the pattern pages for the tank top, top, sundress and apron.
Common mistakes
| What went wrong | Why | How to fix it |
|---|---|---|
| The neckline stands up stiffly or ripples | the tape wasn't cut on the 45° bias | re-cut it strictly on the diagonal and check the angle |
| The neckline stretched out | the tape was pulled while sewing | on concave sections, stretch the tape slightly — but not the neckline |
| Puckers in the tape at the curve | the tape wasn't pressed into shape | bend it into a curve with the iron before sewing |
| The stitching on the wrong side slid off the tape | the tape is narrower than the edge | sew along the fold of the tape, not along the edge; stitch slowly from the right side |